576. Mohanthal
Celebration Time
I joined the #FoodieMonday#Bloghop group in the month of March when they were on their 31st theme.This week we are on our 50th theme…wow. Its time to celebrate. Celebration is usually with something sweet.The group decided on #Traditional Sweets. I decided to make an authentic Gujarati mithai (dessert), mohanthal. I get a bit nervous when I have to prepare traditional Indian sweets. I would have opted for easier traditional sweets like shiro(sooji halwa), lapsi, shrikhand, basundi, but I’ve already posted those. Had Mohanthal and Magas on my ‘to do list’. I decided on Mohanthal as I prefer that to magas.
Before I go into explaining how to make mohanthal, I must tell you a bit about the #FoodieMonday#Bloghop group. Right now we are 10 members. One stays in US, one in Singapore, five in India, one in Qatar, one in Scotland and I live in Kenya. So how do we decide on the theme every week? Our life saviour is Whatsapp. As soon as everyone has posted on Monday, the status changes to “What Next?” By Tue evening Wed morning the next theme is decided on. Then the chat is what we are making which usually no one knows till the weekend. Besides that we are like a family, sharing our joys and sorrows. I am glad I’m a part of this group for various reasons. I’ve found new blogger friends. I’ve learnt so much about regional cooking, get to become a little wiser technology wise, learn about different cultures and help is always available when one is stuck, be it in food preparation, taking decisions, family crisis etc. Basically, different time zones has not prevented us from keeping in touch with each other. The one in US probably catches up with all our chats much later, because of the huge time difference. Hoping that one day we all can actually meet up.
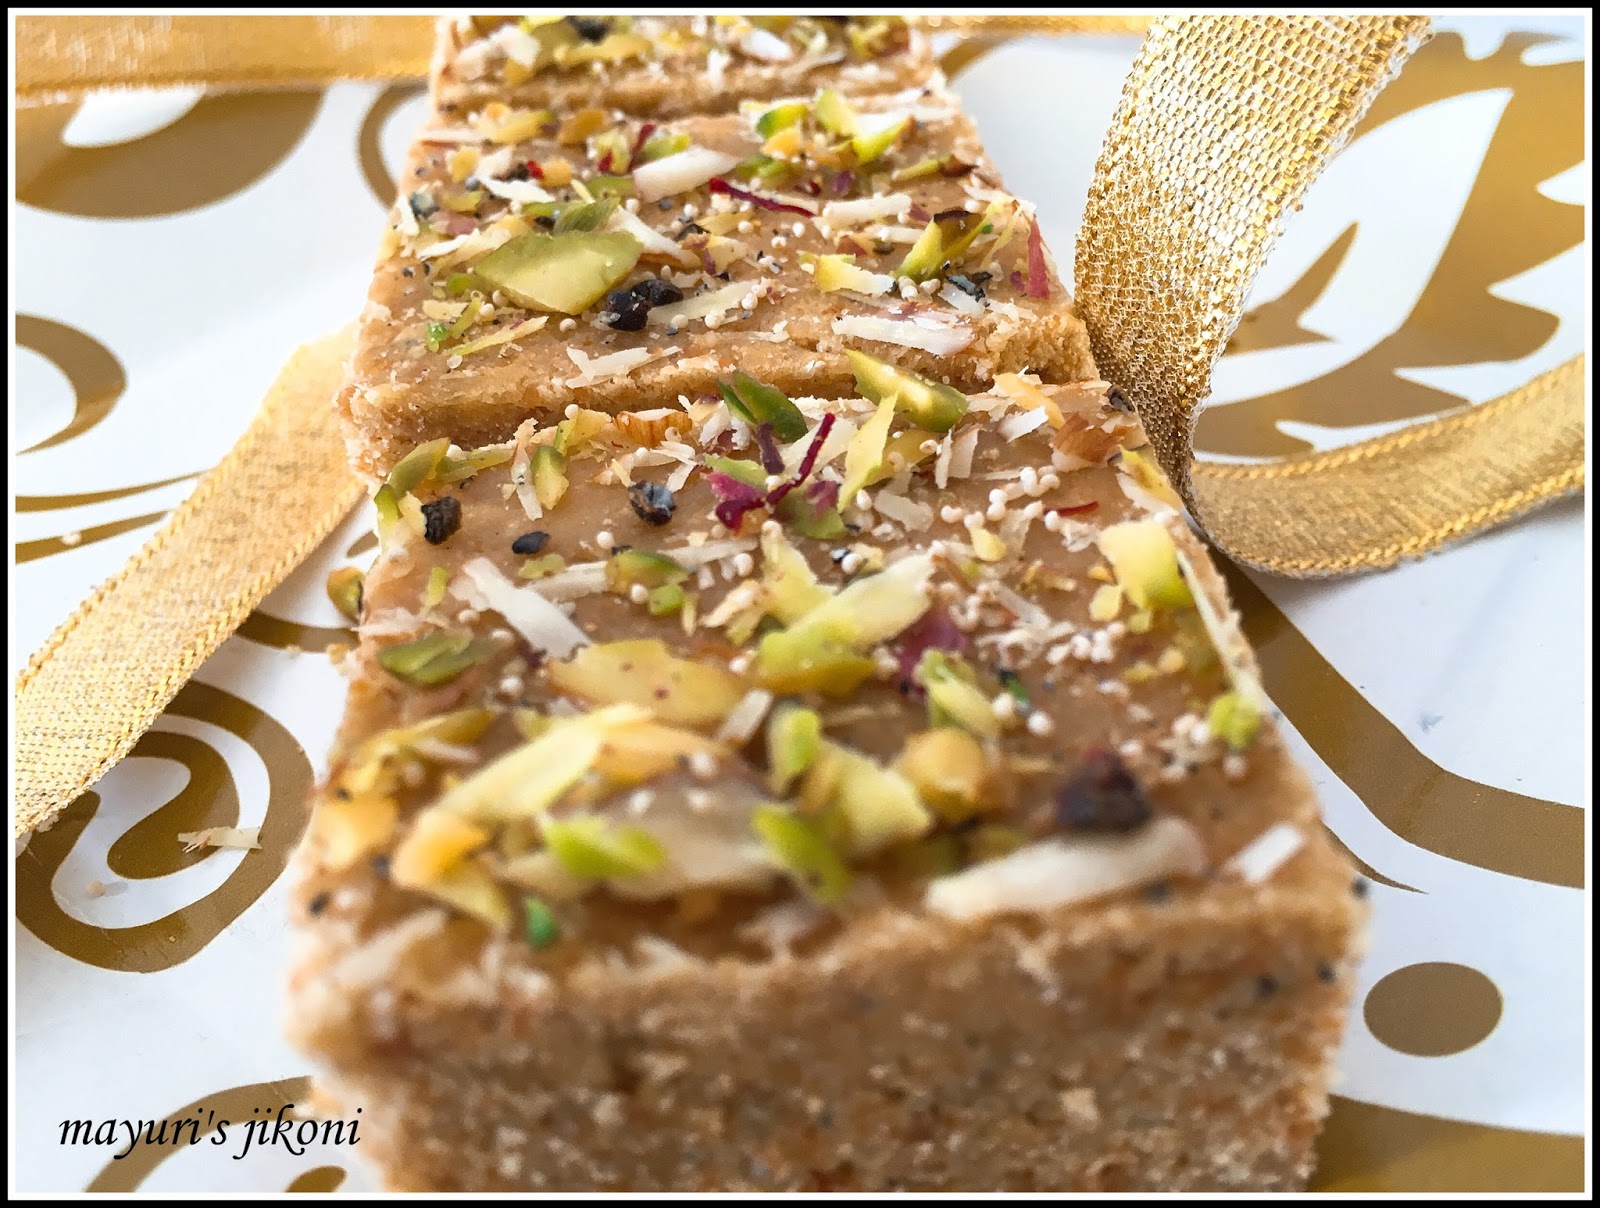
Coming to Mohanthal, its a typical Gujarati traditional fudgy type of sweet preparation made from chickpea flour, milk solids(khoya),sugar, ghee(clarified butter) a few spices and nuts.Its usually served during special occasions or made during Diwali. It is believed that Mohanthal is Lord Krishna’s favourite and therefore many add orange food colour to it. I prefer not to add food colour. Traditionally made Mohanthal is full of ghee, a thin film of ghee solidifies on top of the set mohanthal. Its basically like a barfi but made with chickpea flour. My mother in law, Nunu use to make mohanthal quite often as we use to host many parties at home. I’ve used her recipe. However, must confess that my mamiji now living in Walsall makes the best mohanthal. Mohanthal can be served set like barfi or even as a hot fudgy, thick semi solid consistency. I love the hot version more.
Watch How To Prepare Homemade Khoya/ Mawa


MOHANTHAL
16-20 pieces
2½ cups chickpea flour(chana flour, besan)
1 -1¼ cups solid ghee (clarified butter)
1 cup grated or crumbled khoya (mawa, milk solid)
1½ – 1¾ cups white sugar
1 cup water
¼ cup warm milk
½ tsp coarse cardamom powder (elachi)
1 tsp cardamom powder (elachi)
½ tsp mace powder (javantri)
½ -¾ tsp nutmeg powder (jaiphal)
a generous pinch of saffron
Topping:
¼ tsp coarse cardamom powder
2 tsp poppy seeds (khus khus) optional
2-3 tbsp almond slivers
2 tbsp pistachio slivers
a few saffron strands
First we need to prepare the dhabo as its called in Gujarati.
- To prepare that, warm up ¼ cup ghee till its liquid. Add to the warm milk and mix.
- Add this mixture into the chickpea flour.
- Rub it between your fingers or palms till the mixture resembles like breadcrumbs.
- Leave the chickpea flour mixture to rest for 30 minutes.
- Add sugar and water into a pan and heat it over medium heat.
- Stir it frequently.
- Make this into a one string consistency. This takes about 7 minutes.
- Add saffron strands and cardamom powder to the hot syrup.
- Leave it on the side till required.
- Grease a 8″X 8″ tray with some ghee.
- To get even texture, pass the chickpea flour mixture through a sieve with large holes. Rub the larger pieces into the sieve net till all of it has passed through the mesh.
- Add the remaining ghee into a wide pan. Put it over medium heat. Let the ghee melt.
- Add the sieved chickpea mixture. Lower the heat to low.
- Stir it constantly and roast it in the ghee till it becomes golden almond colour. Make sure you roast it over low heat and its brown enough. This takes about 12-15 minutes.By now the mixture will be much lighter weight wise and fluffy.
- Add the khoya and mix till the khoya dissolves.At this stage the mixture will appear whitish. Roast it for a further 5-6 minutes.
- Add the coarse cardamon powder, nutmeg and mace powder. Mix well.
- If the syrup has become cold, warm it up again.
- Add the syrup to the roasted chickpea flour mixture.
- At this stage the mixture will be very liquidy. However, keep on stirring for 2-3 minutes and it will become thick.
- Pour the mixture into the prepared tray.
- Level it out using the back of a spoon.
- Sprinkle the topping over it i.e. almond, pistachio slivers, poppy seeds, coarse cardamom powder and saffron strands.
- Press it into the mohanthal lightly using the back of a spoon.
- Let it set for 30 minutes. Cut into squares (the size you desire) but do not remove from the tray.
- Now let the mohanthal set completely. Usually I leave it overnight.
- Remove mohanthal squares from the tray and serve or store in an airtight container.
- I used only 1 cup of ghee, you can use 1¼ cups if you like.
- I used 1½ cups of sugar which was fine for us. If you prefer a more sweeter mohanthal use 1¾ cups.
- Add orange colour if you like. Add it to the syrup.
- If you want to serve hot mohanthal, just prepare it half and hour before you have to serve. If it begins to set before you serve it, then you can add about ½ cup water and heat it up again.
- Refer to this article on how to make the right consistency of sugar syrup.
 |
| googra |


 |
| Gur na ladwa (churma ladoo) |


15 Comments
Sujata Roy
July 25, 2016 at 4:46 pm
Yummy share Mayuri. Loved it. Loved the way you described our group. Awesome.
Pushpita
July 25, 2016 at 6:15 pm
Loved the traditional recipe share Di! Detailed and well -explained recipe with step by step pictorials too. The post has gotten me touchy today, definitely most of us stay in different time zones, yet we are so closely connected inspite of the fact that each one of us exist virtually till date. Touchwood! Looking forward to our meeting very soon.
Nisa@ Flavour Diary
July 26, 2016 at 10:11 am
lovely share dee…mu may paani aagaya
Saswati Hota
July 26, 2016 at 6:02 pm
Loved the post Dee…and am making this for sure soon…this is in my to do list since long and I have got the recipe from the right person now.😀
seenasfoodbasket
July 26, 2016 at 6:44 pm
Good share.. Loved the detailed explanation and the clicks too.. You have done it beautifully..
Mayuri Patel
July 27, 2016 at 5:04 pm
Thanks Sujata, it is a unique group.
Mayuri Patel
July 27, 2016 at 5:06 pm
so true Pushpita. I'm glad I've got to know you through this group. May the friendship continue forever.
Mayuri Patel
July 27, 2016 at 5:11 pm
Heeheee, Nisa, wish I could have sent some for you.
Mayuri Patel
July 27, 2016 at 5:13 pm
Thanks Saswati, my neighbour too loved it…got to make a bigger batch in 2 weeks time for her son's birthday.
Mayuri Patel
July 27, 2016 at 5:13 pm
Thank you so much Seena.
Renu Agrawal Dongre
August 24, 2018 at 5:39 pm
This looks absolutely yum …Love the way you have explained the recipe..
mayurisjikoni
August 24, 2018 at 11:00 pm
Thank you so much Renu.
Vanitha Bhat
August 30, 2018 at 9:10 pm
I have been meaning to make this for ages!! Your presentation and recipe is motivating me to go for it soon 🙂 Thanks for sharing!
mayurisjikoni
September 2, 2018 at 3:13 pm
Thanks Vanitha and please do let me know how it turns out.
Jai
February 16, 2020 at 10:22 am
Made this recipe, it turned super tasty.