536. Tiger bread rolls/ Dutch crunch rolls
Tiger, tiger burning bright
Remember reciting this poem by William Blake when you were in school? I just couldn’t help trying to remember the lines while I was baking this bread. I had to google the poem and check out the correct lines. Still can’t remember the lines. It probably means my brains too are getting old 🙂
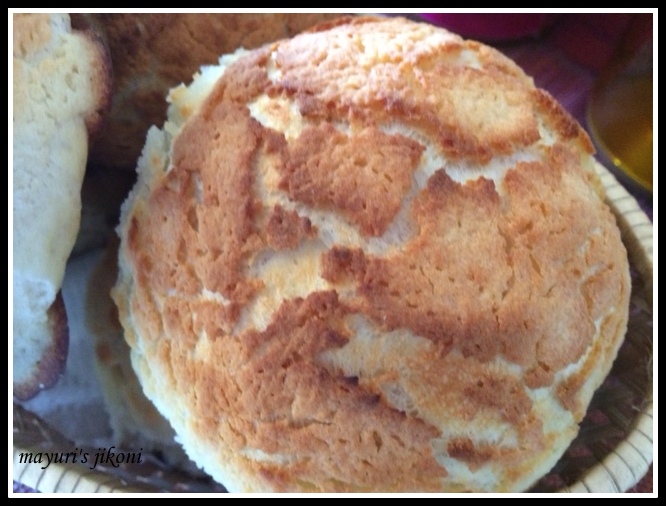
So lets come to the actual bread. I saw this mottled topped bread at Nakumatt and was really fascinated by the effect. Bought the rolls and they tasted like just any other ordinary rolls. Then one fine day I stumbled upon the recipe and actual name of the bread… tiger bread or Dutch Crunch Bread. I wonder why its called tiger bread since there are no stripes on the top. It should actually be called a giraffe bread as it resembles the spots on a giraffe. Further search on the famous google led to this sort of bread being known as alligator bread too.Its believed that the bread originates from Netherlands. The paste or topping is made using rice flour and sesame oil to give it that unique nutty flavour. The end result is a crunchy exterior and a soft interior. Well, whatever its called, I just wanted to learn how to get that beautiful mottled look on top of a loaf or rolls. The first time I tried the recipe out, the mottled effect did not happen at all. It was perhaps because the paste or topping was too thin and there was not enough yeast in it. The second attempt too was a disaster. The recipe I followed suggested that I apply the topping or paste when the buns have risen. Applying the thick paste on risen dough is not easy. The buns got flattened a bit and the mottled effect was not apparent. While browsing through different recipes, I discovered that some applied the paste or topping before the second proving stage and some, after. Finally Delia put my mind to easy as she had written in a comment about tiger bread to apply the paste or topping before the second proving stage.
I used my normal white bun recipe and got the recipe for the topping or paste from bright eyed baker. The rolls turned out good and would have loved a much better mottled effect, but what I achieved this time round made me happy. So I decided to post this recipe for the We Knead to Bake January challenge. For January, Aparna suggested we bake any bread of our choice. You can either make buns or make a bloomer shaped loaf or any shape you like. I must admit the crunchiness was not too apparent the next day so its best to enjoy the bread on the day its baked.


TIGER BREAD ROLLS/ DUTCH CRUNCH ROLLS
Makes 8-10 buns (8 large and 10 medium)
For the dough:
3-3½ cups plain flour (all purpose flour)
1-1¼ cup warm milk
2 tbsp butter (or if you prefer sesame oil)
2¼ tsp instant active dry yeast
1 tsp salt
1 tsp sugar
For the topping or paste :
¾ cup rice flour
½ cup warm water
1½ tsp instant active dry yeast
1 tbsp sesame oil
½ tsp salt
1 tbsp sugar
extra oil for greasing
extra flour for kneading
Preparation of the bread dough :
- Mix the flour, yeast, salt and sugar in a big bowl.
- Add half the quantity of butter and rub it into the flour.
- Add warm milk and bring the flour together to form a dough.
- Knead the dough on your worktop till it is soft and smooth. Add extra flour little at a time if the dough sticks too much. Usually it takes 10 -15 minutes to get the dough into a nice smooth consistency.
- Add the remaining butter and knead the dough. Shape it into a ball and place it in an oiled bowl.
- Cover the bowl with cling film and let the dough rise till its double the size. This will take about 1½ hours or less if the weather is hot.
- Knead the dough gently.Divide it into 8 or 10 parts.
- Let the dough pieces rest for a while.
- In the meantime prepare the topping or paste.
- Mix all the ingredients for the topping in a bowl till it becomes a smooth paste.
- Grease a baking tray with oil.
- Roll each piece of the dough into a round shape. Pinch the seams well and place that seam side down on the tray.
- Coat the shaped rolls with the topping or paste well. It should cover the whole roll and it should be thick enough.
- Place the tray in a warm place, cover with a tea towel and let the rolls rise for 30 minutes or till they are nearly double the size.
- In the meantime preheat the oven at 200°C.
- Put the rolls in the oven to bake. Bake at 200°C for the first 10 minutes.
- After 10 minutes reduce the temperature to 180°C and bake for a further 10 minutes or till the crust is a nice golden colour.
- Remove the rolls from the oven.
- Place them on a wire rack to cool.
- Serve with soup or butter or your favourite jam.
- Try and add sesame oil to the paste. It gives the bread a wonderful nutty flavour.
- If the paste is too thin, or there is less yeast the mottled effect will not happen.
- Coat the bread well with the paste.
- The paste should be thick. When you drop it from the spoon it should fall in lumps and not in ribbons.
- Since I didn’t want the tea towel touching the paste, I covered the tray with the rolls during the proving stage with a big bowl… a really big bowl!


 |
| spiced pumpkin bread rolls |


9 Comments
Amrita Roy
January 19, 2016 at 4:00 pm
I was laughing while reading the post and wondering like you why the bread name was kept tiger bread? Jokes apart , they look really good irrespective of any name
Sowmia pragash
January 19, 2016 at 7:56 pm
This is so new to me.. Love to bake this recipe soon.
Hema
January 20, 2016 at 3:45 pm
The bread looks superb, yet to try this..
Dannii @ Hungry Healthy Happy
January 20, 2016 at 4:04 pm
These always smell so amazing when I am in Asda, but I really need to try making them myself.
Mayuri Patel
January 20, 2016 at 4:18 pm
Amrita, I searched on the internet and didn't come across as to why its called tiger bread. It is a different sort of bread.
Mayuri Patel
January 20, 2016 at 4:20 pm
Try out Sowmia,if you love baking. Am sure the family will like the bread.
Mayuri Patel
January 20, 2016 at 4:21 pm
Thanks Danii, they say that the amazing smell is due to the sesame oil. My home did smell good while the bread was baking.
Mayuri Patel
January 20, 2016 at 4:22 pm
Thanks Hema, do try out the recipe.
Nayna Kanabar
January 22, 2016 at 12:04 pm
We regularly buy tiger bread from our bakery but having it homemade must be even better.